ElectronVisualized

ElectronVisualized
Web-based atomic and molecular orbitals viewer developed by a high school student, using spherical harmonics and Density Functional Theory formulas.
Official Build 6.0
Developed and Designed by John Seong. Served under the MIT License.
Launch Web App
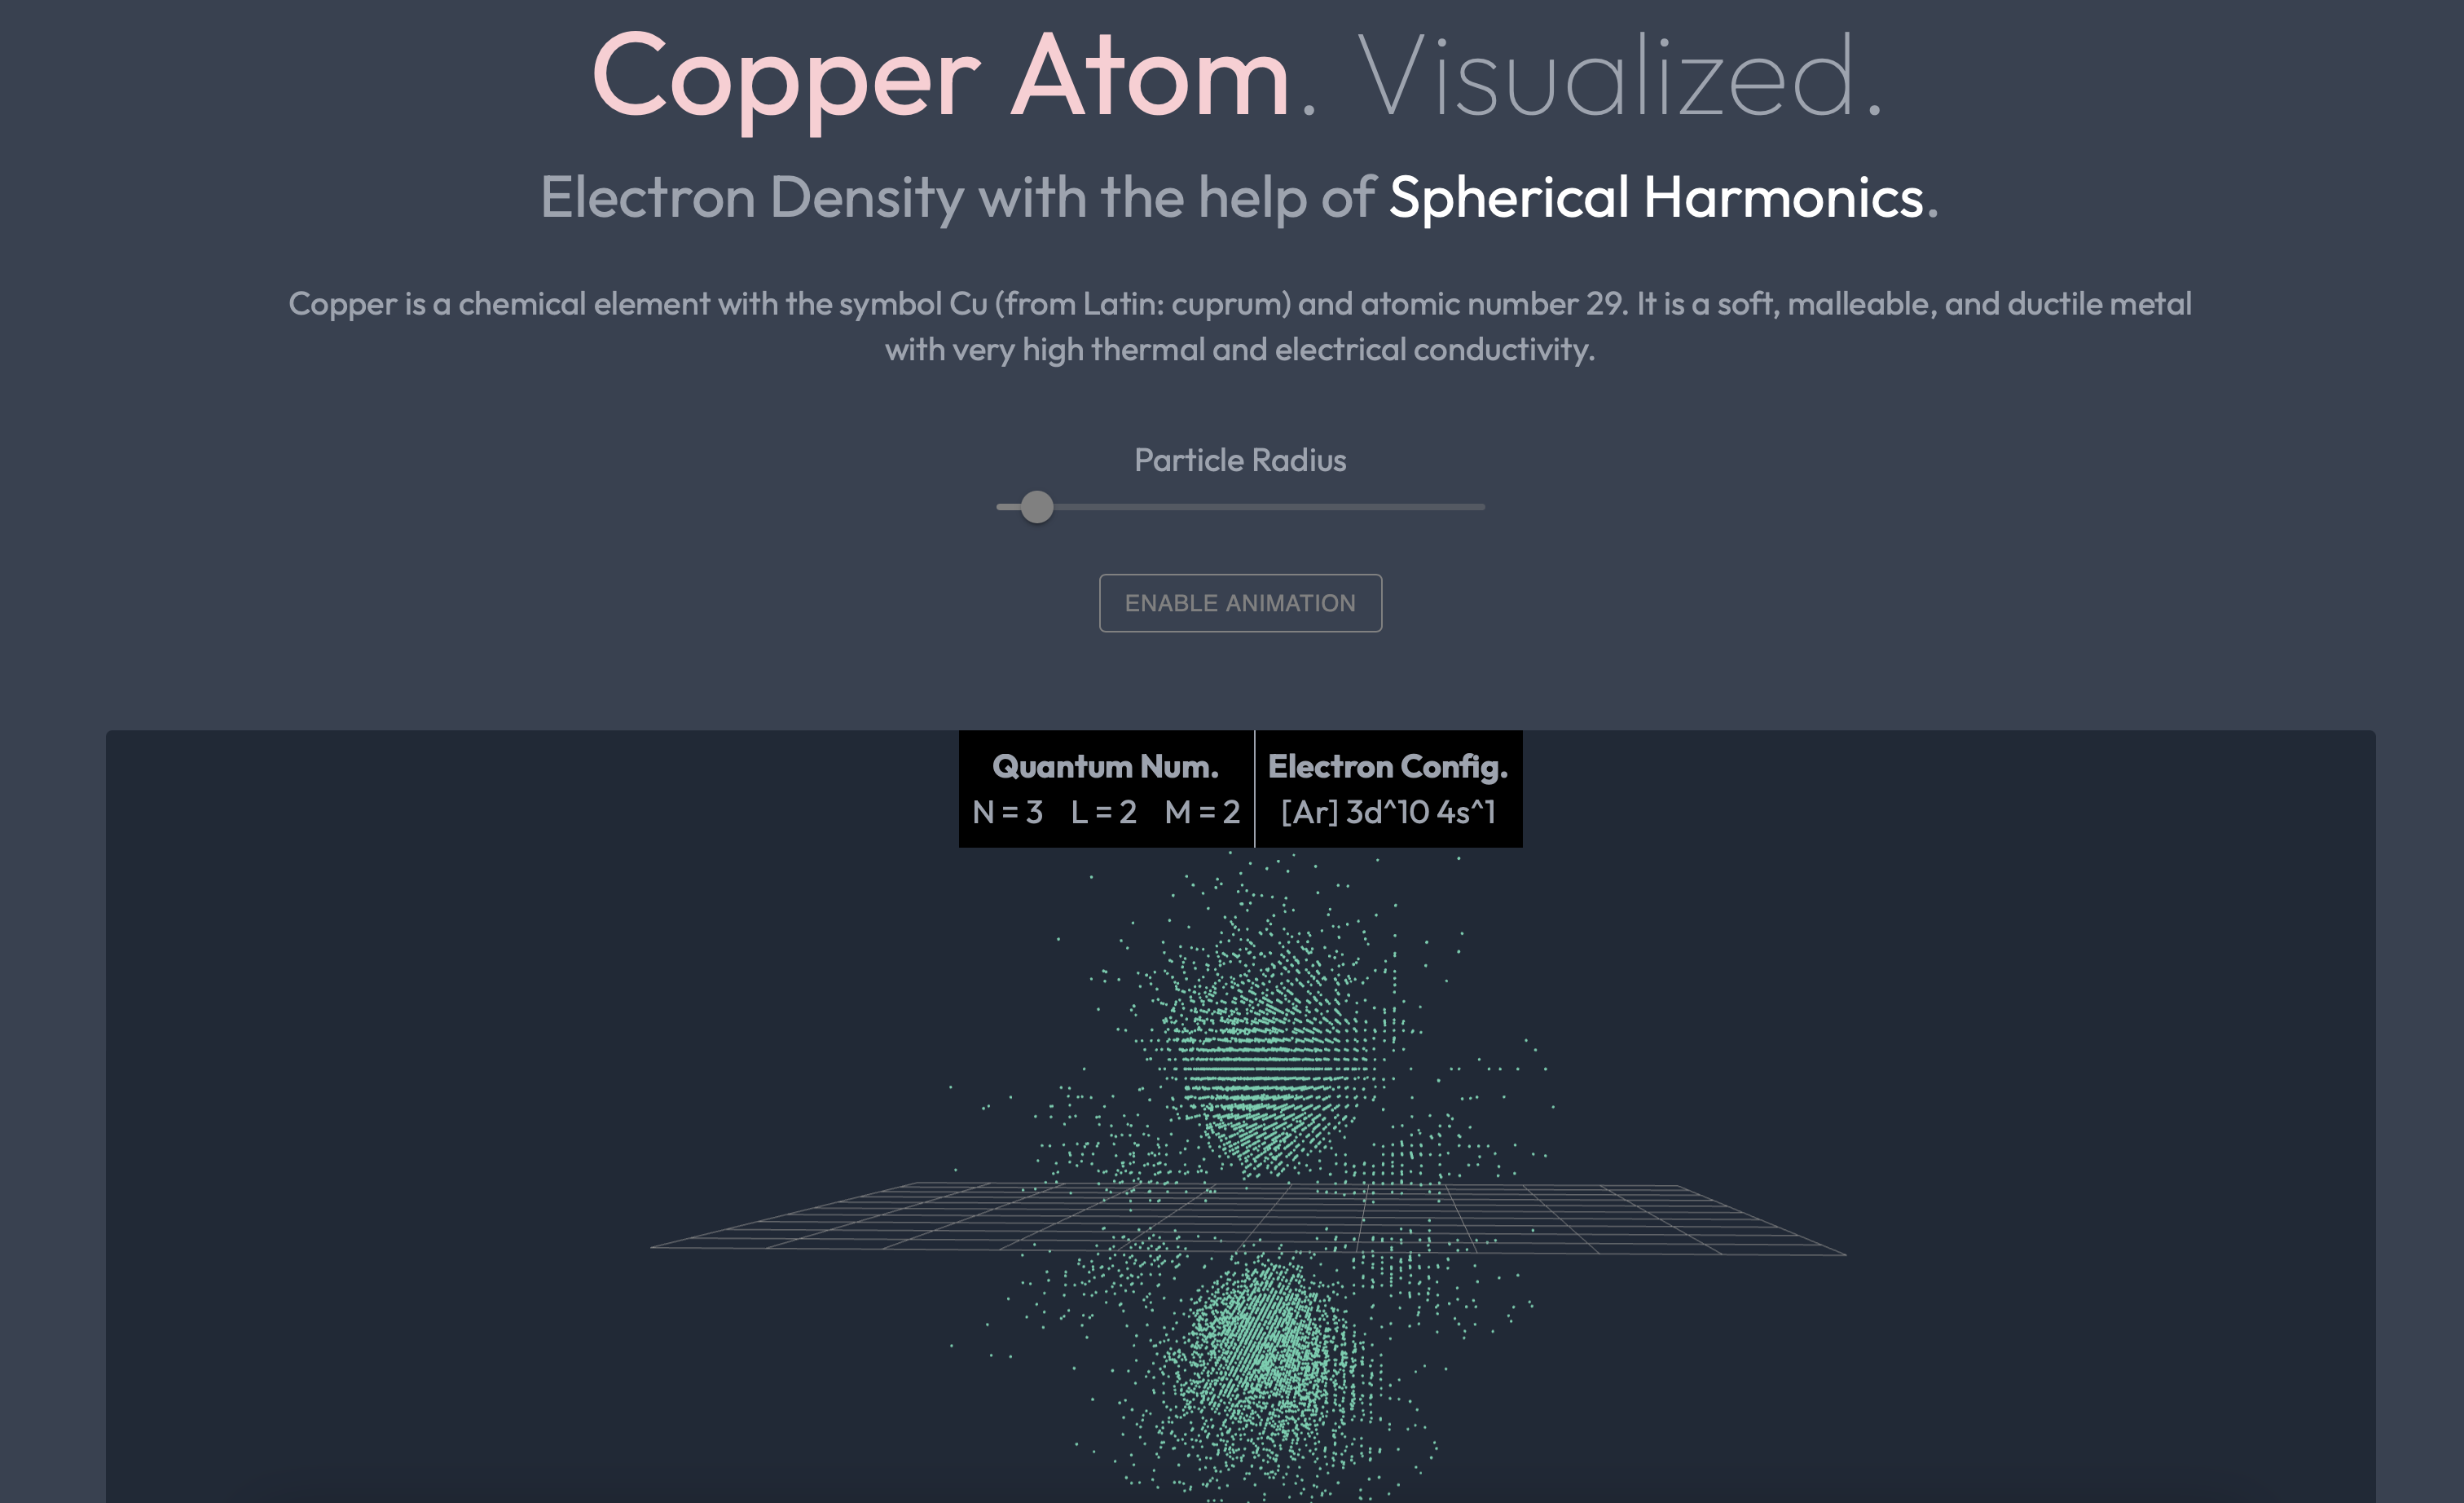
Atomic Orbitals
ElectronVisualized uses the spherical harmonics formula to accurately depict the shape of each atomic orbital based upon its four quantum numbers. Each dot represent a probable location of where an electron might be.

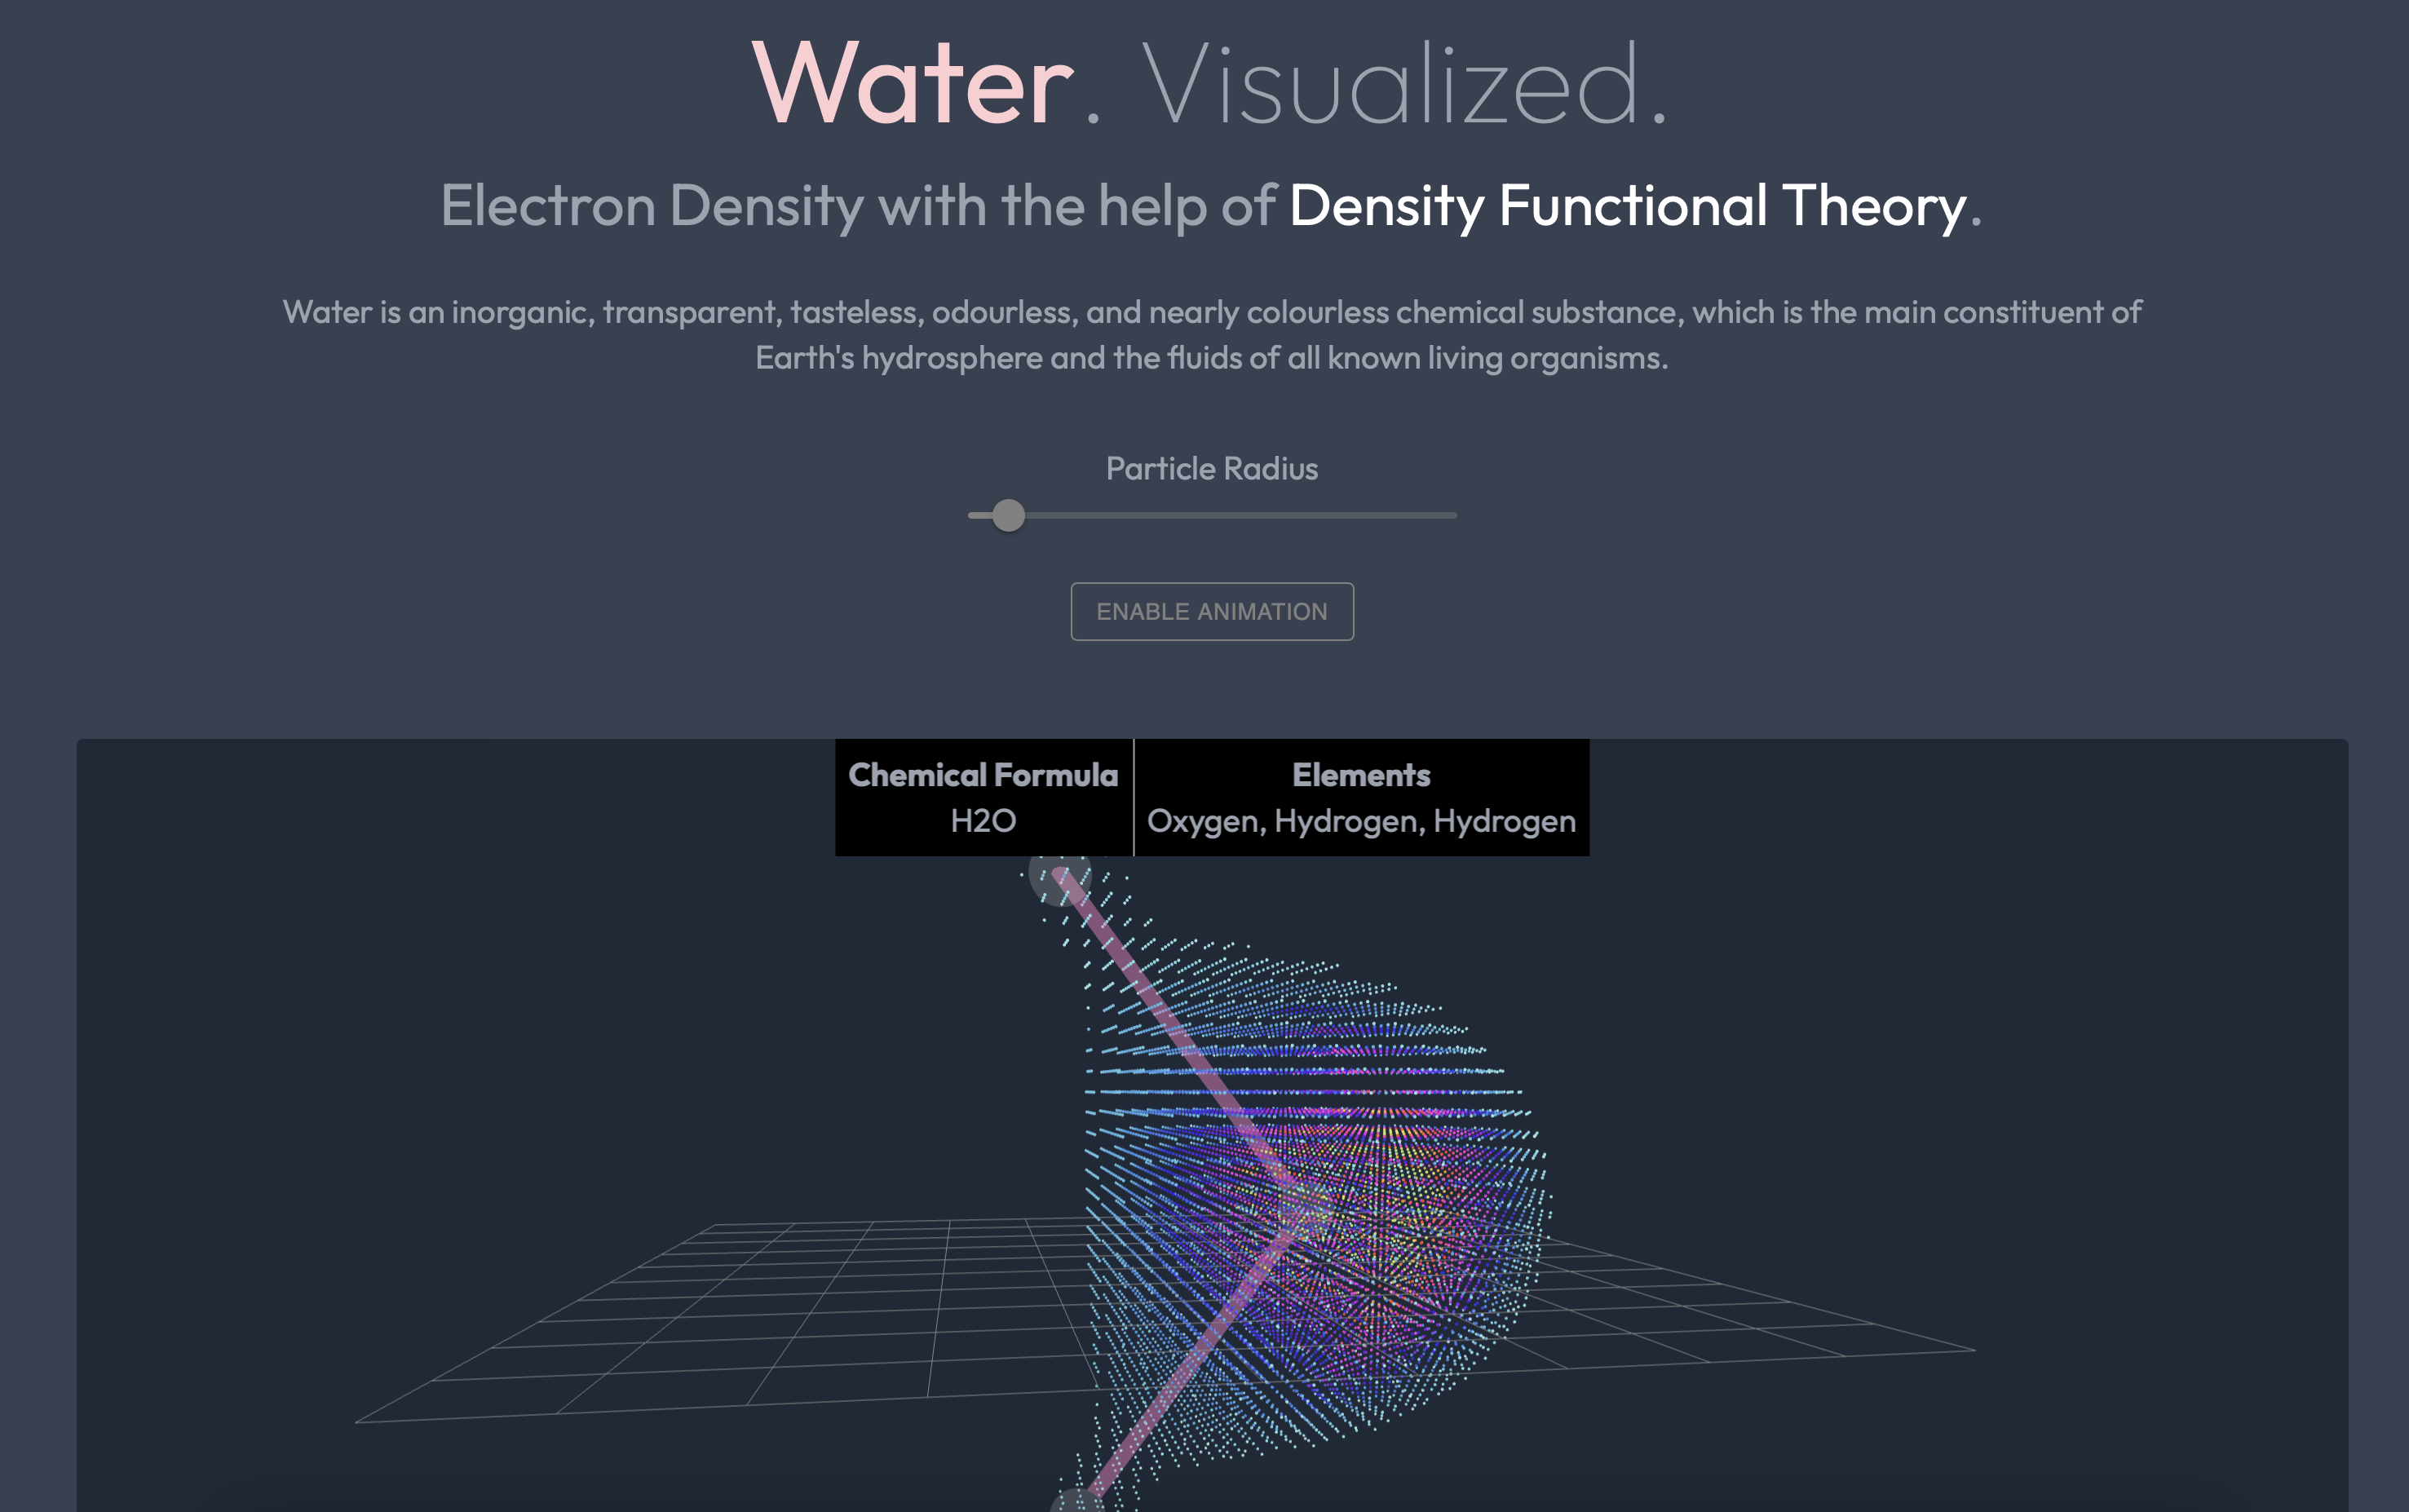
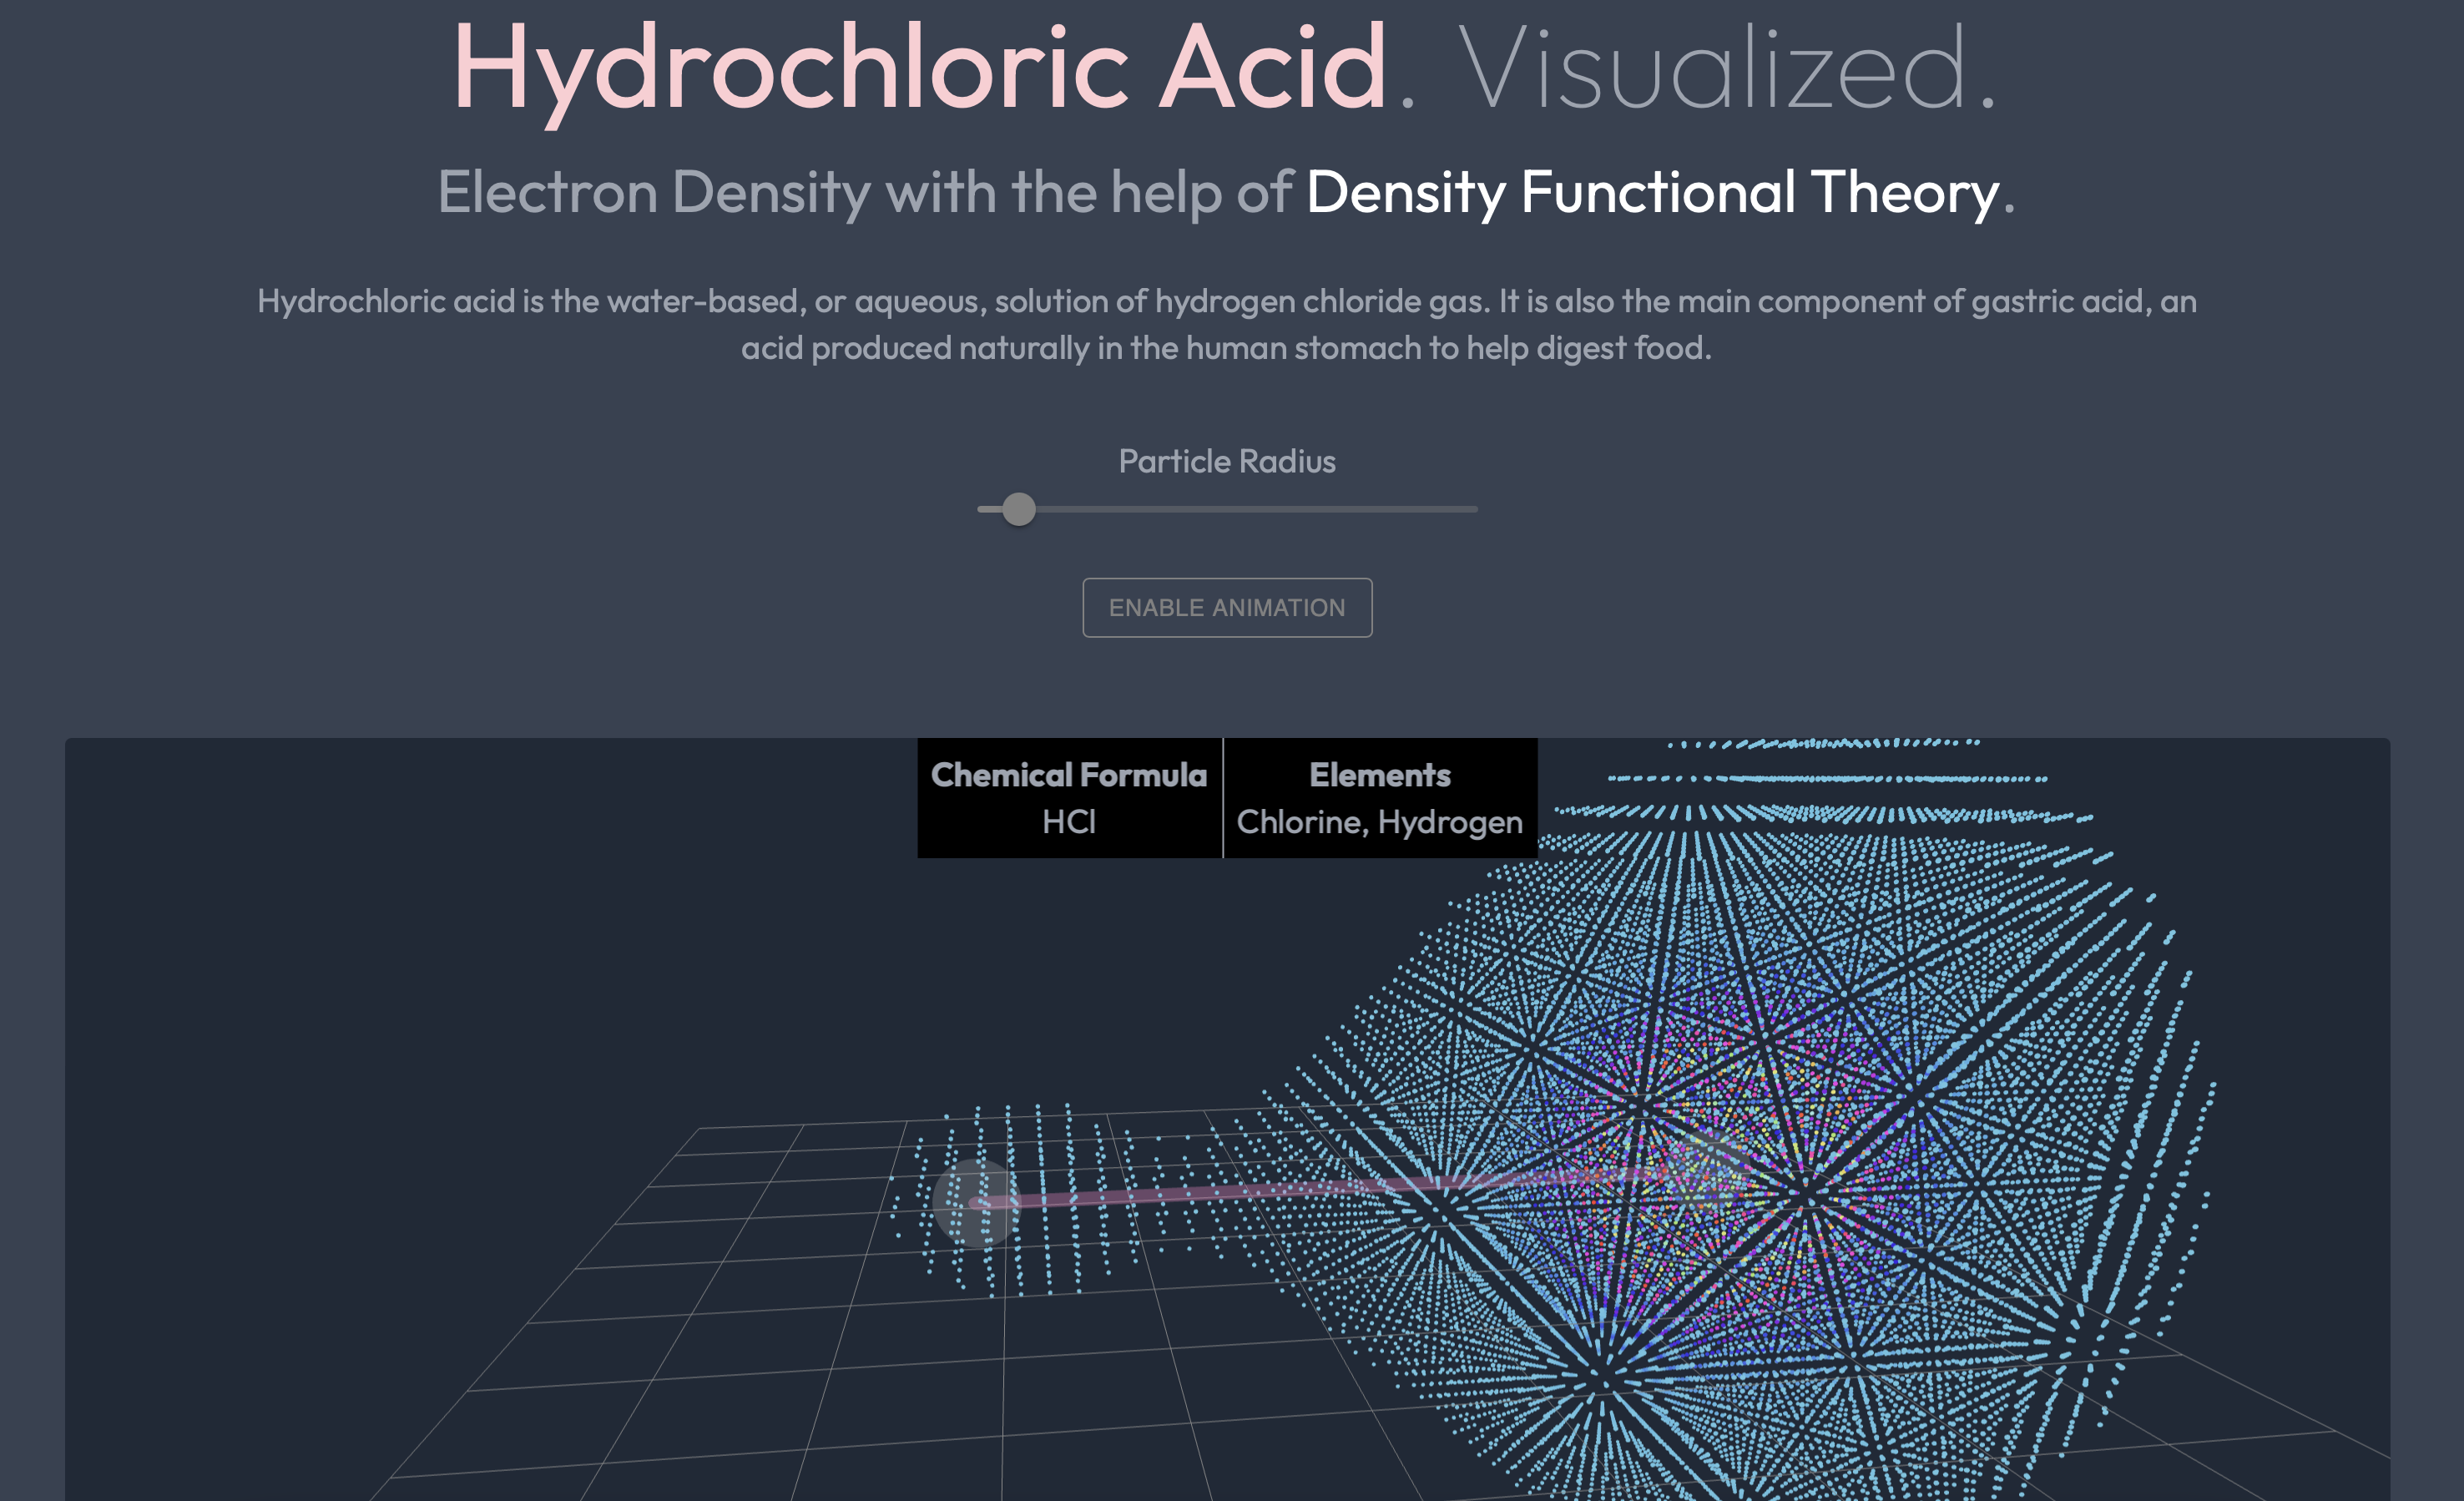
Molecular Orbitals
Thanks to Density Functional Theory and GPAW library, we were able to derive the electron density of a molecule without going through complex steps of solving a N-dimensional Schrödinger’s Equation.
World Engine REST API Guide
https://electronvisual.org/api/load/<molecule_name_goes_here>
Loads the x, y, and z coordinates of a molecule based upon the DFT calculations, all from the Amazon S3 server with blazingly fast speed guaranteed.
https://electronvisual.org/api/loadSPH/<atom_name_goes_here>
Retrieves the x, y, and z coordinates of an individual atom derived from the Spherical Harmonics formula. This might take a little more time as it is more precise and contains significantly more information.
P/S: Remove the ‘<>’ brackets upon its actual usage!
Project Sketches
These sketches were drawn at the early stage of development.


Technologies Used
Front-End: ./client
- React: A Front-End Javascript Library
- React Three Fiber and Postprocessing: WebGL 3D Libraries for React
- React Redux: An Open-Source JavaScript Library for Managing and Centralizing Application State
- Tailwind CSS: A Utility-First Cascading Style Sheets Framework
- Headless UI and Material UI: UI Component Libraries
Back-End: ./server
- Flask: Python Microframework for Web — INSTALL VIA PIP
- Docker: OS-level Virtualization — INSTALL ON THEIR WEBSITE THROUGH GUI INSTALLER (FOR HEROKU DEPLOYMENT ONLY)
- NumPy and SciPy: Core Libraries for Scientific Computing — INSTALL VIA PIP
- ASE: Atomic Simulation Environment — INSTALL VIA PIP
- Libxc: The Electronic Structure Library for DFT (Density Functional Theory) — INSTALL VIA BREW, APT, OR CHOCOLATEY
- BLAS: Basic Linear Algebra Subprograms — INSTALL VIA BREW, APT, OR CHOCOLATEY
- GPAW: Projector-Augmented Wave Extension for ASE (Pseudo Wave Function Generator) — INSTALL VIA PIP
- WebRTC: Real-time Communication — INSTALL VIA PIP
How to Run Locally
- Install C-based dependencies BLAS and Libxc globally, e.g. using
brewon macOS or other package managers likeAPTon Linux orChocolateyon Windows (Heroku runs on top of Ubuntu by default, so in this case, I set up aDockerfiletoapt-get install. A bit of trial and error were involved in the process of finding the right method, as Heroku’s officialAPT buildpackwas not suitable for deploying applications that involve scientific computing (modules such as SciPy or GPAW) - Setup the client-side:
cd client && npm install yarn buildto convert React*.JSXinto production files that Flask (our back-end) can read- Setup the server-side: On a seperate terminal, go to the
rootfolder, and set up a virtual environment - OPTIONAL:
gpaw install-data <dir>if you would like to generate your own version of GPAW datasets; otherwise, use the one that is pre-packaged in this repo - Run
export GPAW_SETUP_PATH=~/gpaw-setups-<version>to direct the API to the GPAW datasets that are rendered in step 5 (or use the one that is already included in this repo) - Just as a side note, Step 6 when deploying on Heroku can be replaced by setting an environment variable in the
CONFIG_VARmenu on the dashboard (Just set it toGPAW_SETUP_PATH=server/datasets/gpaw-setups-0.9.20000if you don’t know what you’re doing) - Execute
pip3 install requirements.txt && cd client && yarn start-apito download all the PyPi dependencies as well as running the Flask server (Optionally, you can go to therootfolder and executeflask runinstead)